
Growing peppers in a hydro tower: from sowing to harvest
When to sow, which nutrient comes in which phase, which pH and EC values fit and what I’ve learnt in my pepper years.
Peppers in the hydro tower: germination, seedlings & care
Your complete guide to strong pepper plants and a rich harvest
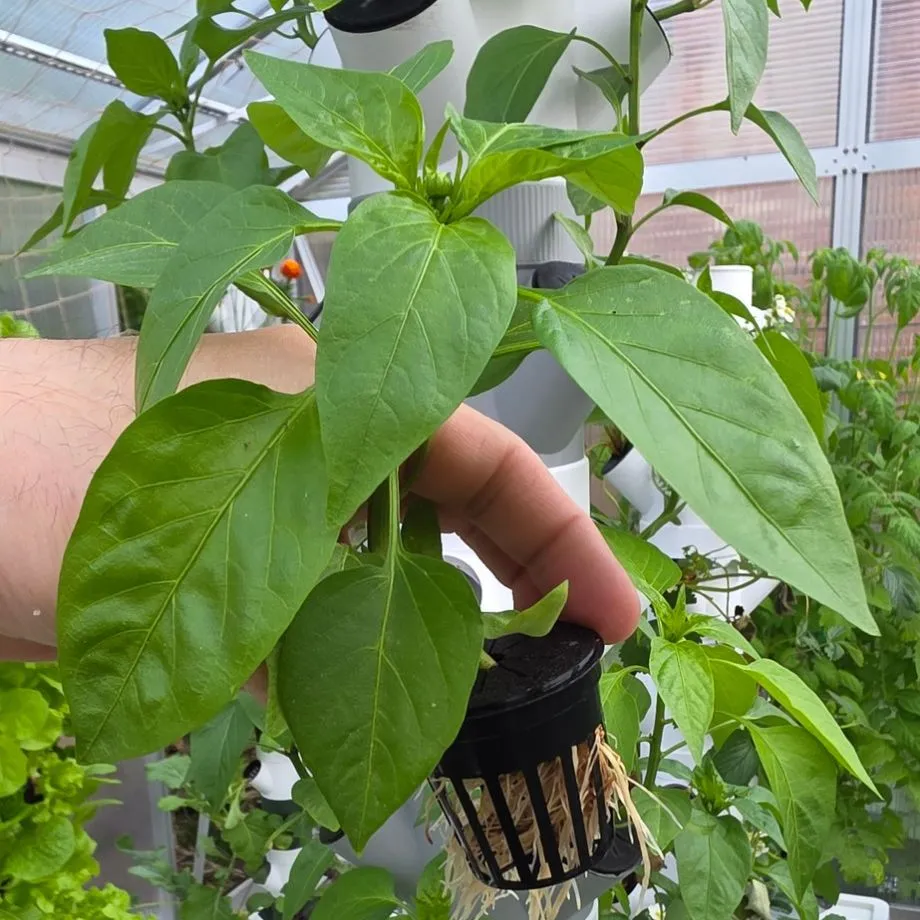
Growing peppers in a hydro tower is ideal for anyone who wants to harvest fresh, aromatic peppers in a space-saving and efficient way. With the right hydroponic method and targeted nutrient supply you’ll get strong plants and a rich harvest, completely without soil!
Why grow peppers hydroponically?
Ideal nutrient supply
Faster growth
Fewer pests
Year-round growing
Why peppers do so well in the tower
For me, peppers are among the most rewarding plants of all. Unlike tomatoes, they grow great in the slim vertical tower too. My pepper tower had 15 segments with 45 plants and was 2.50 metres tall in the end. It stood against a 2 metre frame attached to the reservoir. Peppers drink little and never gave me any problems.
Without soil every plant gets exactly the nutrients it needs right now, and the roots always have enough water and air. You don’t water, you measure. And because there’s no soil involved, you don’t bring in soil pests either.
Related:What hydroponics is and how growing without soil works›Pepper profile
| What | Value |
|---|---|
| Sowing | early March, that’s enough in hydroponics |
| Germination | dark germinator, 24 to 30 °C, usually 7 to 14 days |
| Move to the tower | after about 21 to 35 days, depending on variety |
| Outdoors | from mid-May, when nights no longer drop below 10 °C |
| pH value | 5.5 to 6.0, my target 5.8 |
| EC value (mS/cm) | seedlings 0.5, young plant 1.0, growth 1.5, fruit 2.0 |
| Water temperature | 18 to 24 °C |
| Light indoors | 350 to 500 PPFD, 14 to 16 hours |
| Harvest | when the fruit has its full colour and is firm |
| Sorte: | Hersteller: |
Dünger, EC und pH
| Phase | EC (mS/cm) | Frankies Dünger | pH |
|---|---|---|---|
| Anzucht (erste Blätter) | 0,5 | 0,5 ml pro Liter | 5,5 bis 6,0 |
| Jungpflanze | 1,0 | 1 ml pro Liter | 5,5 bis 6,0 |
| Wachstum bis zur Blüte | 1,5 | 2 ml pro Liter | 5,5 bis 6,0 |
| Blüte und Frucht | um 2,0 | Dreifachdünger oder Pulver | 5,5 bis 6,0 |
Zeitplan und Beobachtungen
Pflege
- Samen in den Schlitz legen, nicht eindrücken.
- Deckel drauf und warm stellen, z. B. Heizmatte.
- Ab der Blüte Dünger wechseln.
- Drinnen Blüten sanft schütteln.
- Gleichmäßig Wasser gegen Blütenendfäule.
- Ernten, wenn die Frucht ihre volle Farbe hat.
Blattläuse: an Triebspitzen und Blüten. Mit Wasser abbrausen.
Spinnmilben: helle Pünktchen und feine Gespinste bei trockener Luft. Blätter abbrausen.
Weiße Fliege und Thripse: Gelb- und Blautafeln aufhängen.
Blütenendfäule: braune Stelle unten an der Frucht. Gleichmäßig versorgen, Calcium nicht vergessen.
Mein Tipp: Blattunterseiten einmal pro Woche anschauen, dann erwischst du alles früh.
Wasserwechsel und Messwerte
| Datum | Wasser neu | EC | pH |
|---|---|---|---|
| ☐ | |||
| ☐ | |||
| ☐ | |||
| ☐ | |||
| ☐ | |||
| ☐ |
| Datum | Wasser neu | EC | pH |
|---|---|---|---|
| ☐ | |||
| ☐ | |||
| ☐ | |||
| ☐ | |||
| ☐ | |||
| ☐ |
Step by step: peppers in the hydro tower
1Germination phase
March · no nutrient
The sowing time for peppers is early March. That’s enough, because everything grows faster in hydroponics, otherwise you’ll have space problems by mid-May. At this time natural daylight isn’t enough, so after germination I support with a seedling lamp and give the seedlings 14 to 16 hours of light a day. For germination I use foam sheets from my shop, one pepper seed goes into each cube. One seed per foam cube, peppers don’t need more.
Peppers are dark germinators. Put the seed in the slit of the cube, you don’t need to press it in. With the lid on the seedling box it lies in the dark. You reach the ideal germination temperature by putting the seedlings on a warm surface, for example on the radiator or a heat mat. 24 to 30 °C is ideal. The lid ensures even moisture. The lid holds the moisture, so you hardly need to spray.
As soon as the seedlings are up, the box comes off the radiator, the lid comes off and the lamp goes on. After germination you should lower the temperature and place the plants cooler, ideally at 18 to 20 degrees. The less light is available and the warmer it is at the same time, the longer and less stable the stems grow. So the rule is: little light = cooler temperatures, so the plants stay compact. I don’t feed yet in this phase.

* Affiliate-Link: Bei einem Kauf erhalte ich eine Provision, dein Preis bleibt gleich. Preis inkl. MwSt., zzgl. Versand, Stand 8.11.2026. Bilder: Amazon Creators API

* Affiliate-Link: Bei einem Kauf erhalte ich eine Provision, dein Preis bleibt gleich. Preis inkl. MwSt., zzgl. Versand, Stand 8.11.2026. Bilder: Amazon Creators API

2Seedling phase
about day 7 to 21 · EC 0.5
As soon as the seedlings show their first true leaf pairs, feeding begins with the seedling nutrient from my shop (0.5 ml per litre of nutrient solution). I use my liquid nutrient and add enough to the water until the EC is about 0.5. After germination I separate the seedling cubes and put them into my net pots. I place these in my big seedling station. Those that haven’t germinated yet can keep germinating in the box. The water level must be set so that it lightly touches the foam, that’s crucial for even moisture.
I regularly watch the root development. As soon as the roots have grown right through the foam and become noticeably longer, I lower the water level slightly so the roots can breathe. When 2 to 3 centimetres of roots grow out at the bottom, I lower the water level so the roots get air. In this phase I measure the pH and EC of the nutrient solution with a meter. From now on I measure every 2 to 3 days, always EC first, then pH. I aim for an EC of about 0.5 (500 µS/cm) to encourage stable, healthy development of the young plants. The plants stay in the seedling station until they’ve developed a strong root system. After about 21 days they’re ready to move into the hydro tower.
Affordable, easy to use and perfectly adequate for beginners.
View on Amazon* ›* Affiliate link: I earn a commission if you buy. Your price stays the same.

3Vegetative phase
move into the tower until first flowers · EC 1.0 to 1.5
From day 21 to 35, depending on variety, the pepper plants are moved into the hydroponic system. In the vegetative phase I keep using the seedling nutrient from my shop, because it’s ideally suited to leaf formation. By this time the young plants have built a strong root system and can now keep growing permanently in the hydro tower.
Move to the tower
When the young plant has a strong root ball, it moves into the tower. The pot goes into the opening with the cube, a support ring holds it firmly. Nothing changes with the nutrient, I stay with my liquid nutrient and only increase to an EC of about 1.0. I make sure the EC starts at about 1.0 (1000 µS/cm) in this phase and rises step by step to about 1.5 by the first flowers.
Pump timing
Indoors my pump runs for 5 minutes and then pauses for 30 minutes. That’s enough, the roots stay moist. Outdoors in blazing sun I increase to 15 minutes on and 15 minutes off. If the leaves droop, the pause is too long. The easiest way is a digital timer with a cycle function. The air pump doesn’t go on the timer, it runs constantly.

* Affiliate-Link: Bei einem Kauf erhalte ich eine Provision, dein Preis bleibt gleich. Preis inkl. MwSt., zzgl. Versand, Stand 8.11.2026. Bilder: Amazon Creators API

* Affiliate-Link: Bei einem Kauf erhalte ich eine Provision, dein Preis bleibt gleich. Preis inkl. MwSt., zzgl. Versand, Stand 8.11.2026. Bilder: Amazon Creators API
Growth until first flowers
I stay with my liquid nutrient and raise the EC step by step to about 1.5. In a running tower I don’t change the water every week. I top up with ready-mixed nutrient solution, measure and balance: if the EC is too low, a little nutrient goes in, if it’s too high, plain water. The pH should stay stable between 5.5 and 6.0, I measure regularly with a digital meter. Water temperature plays a role too: 18 to 22 degrees is ideal.
The lighting continues for 14 to 16 hours a day. So the plants stay compact, I make sure there’s enough light intensity and as airy a location as possible, so there’s no trapped heat or excessive stretching. Indoors my lamps hang at the side of the tower, 20 to 30 cm from the plants, because from above the light hardly reaches the lower levels. This phase is mainly about forming stable stems and healthy green leaves: the basis for successful fruiting later.
- 🛒Tomato hooks for hanging*
- 🛒Support rings: give a firm hold in the net pots from my shop
- 🛒Neem oil against aphids*: only use as directed on the pack and not together with predatory mites
- 🛒Hand sprayer*

A few questions about space, location and what you want to harvest, and you get a recommendation.
To the tower advisor ›4Flowering phase
first flowers · EC rises to 2.0
After the seedling and vegetative phases, in which the plants mainly formed strong leaves and stable roots with the seedling nutrient from my shop, a completely new stage begins with the first flowers. Now the previous nutrient is no longer enough, because the plant’s focus shifts: instead of just growing, it starts forming flowers, and later fruit. For exactly that it needs a different nutrient ratio.
With the first flowers the needs shift. The plant now wants considerably more potassium and phosphorus. That’s hardly possible in a single bottle, because calcium flocculates with phosphate in the concentrate. That’s why I now switch nutrients. You have two options.
Option 1: three bottles Grow, Bloom and Micro
That’s why I now switch to the three-part nutrient Advanced Hydroponics of Holland, Dutch Formula (video on YouTube). It consists of three components, Micro, Grow and Bloom, which can be dosed individually depending on the growth phase. While nitrogen was most important for seedlings, in the flowering phase the plant needs more phosphorus and potassium. These encourage flower formation, support cell building and ensure healthy, strong fruit set.
I fed with this for years. Grow brings nitrogen for leaves, Bloom phosphorus and potassium for flowers and fruit, Micro calcium and trace elements. You only change the ratio. Each bottle goes into the water separately, stir well in between and never pour them together directly, otherwise the calcium flocculates. In the transition to flowering I use the ratio Grow : Bloom : Micro = 1 : 2 : 1. That way the plant still gets everything for stable growth, plus specifically the building blocks it needs to form its flowers and later fruit.
| Phase | Grow · Bloom · Micro per 10 litres |
|---|---|
| Transition to flowering | 10 · 20 · 10 ml (1 : 2 : 1) |
| Flowering and fruit | 0 · 30 · 10 ml (0 : 3 : 1) |
The amounts are guidelines, your meter decides. I also show how I work with the three-part nutrient in the video on YouTube. How much you need from each bottle for your number of litres is calculated by my Nutrient calculator . There you’ll also find a comparison table of the best-known three-part nutrients. Only with this switch can you make sure your peppers don’t just get big but also form lots of healthy fruit. So the nutrient switch isn’t an extra, it’s a crucial step on the way to a successful harvest.

* Affiliate-Link: Bei einem Kauf erhalte ich eine Provision, dein Preis bleibt gleich. Preis inkl. MwSt., zzgl. Versand, Stand 7.11.2026. Bilder: Amazon Creators API

* Affiliate-Link: Bei einem Kauf erhalte ich eine Provision, dein Preis bleibt gleich. Preis inkl. MwSt., zzgl. Versand, Stand 8.11.2026. Bilder: Amazon Creators API
Option 2: powder nutrient when it’s lots of plants
Bottles are practical, but you mainly buy water. With many plants powder is worth it. It always consists of three parts: Epsom salt, calcium nitrate and a main nutrient for flowering (NPK 15-5-30). Dissolve calcium nitrate and Epsom salt separately in the full amount of water, then add the main nutrient slowly until the EC is right. For peppers an EC of about 2.0 is enough. The amounts in the table apply to 10 litres, the main nutrient (NPK 15-5-30) is a starting value. Soft means: your water has an EC below 0.3 without nutrient, medium 0.3 to 0.5, hard above 0.5.
| Water | Epsom salt | Calcium nitrate | Main nutrient |
|---|---|---|---|
| soft | 1 g | 6 g | 9 g |
| medium | 1 g | 4 g | 9 g |
| hard | 0.5 g | 3 g | 7 g |
Start with less main nutrient, you can always add more. My Nutrient calculator calculates the grams for your number of litres.
Related:Calculate nutrient for your number of litres›📖How I mix the powder nutrient for soft, medium and hard water is in my book (in German) in the chapter “Die Düngung”. Just check the table of contents.›Pollination
Peppers pollinate themselves, every flower has everything it needs. The pollen just has to be shaken out. Outdoors the wind does that. Indoors a small fan helps, or you gently shake the plant once a day. You can also tap the open flowers with a brush or an electric toothbrush.

* Affiliate-Link: Bei einem Kauf erhalte ich eine Provision, dein Preis bleibt gleich. Preis inkl. MwSt., zzgl. Versand, Stand 8.11.2026. Bilder: Amazon Creators API

HydroFlex Tower for indoors and outdoors, seedling box, seedling station, support rings and my own nutrient. After you buy, I’ll help you on WhatsApp.
To the shop ›5Fruiting phase
fruits grow and colour · EC around 2.0
After flowering the ripening phase begins. Now the pepper plant fully forms its fruits: they grow, get firmer and slowly colour up. Now the energy goes into the fruit. In this phase the three-part nutrient Advanced Hydroponics of Holland, Dutch Formula, stays in use, but the mixing ratio is adjusted: I reduce the Grow share, because vegetative growth is complete. Instead I increase the Bloom share to support fruit ripening.
The ratio is now Grow : Bloom : Micro = 0 : 3 : 1. With the three bottles the ratio stays at 0 : 3 : 1, with powder Epsom salt and calcium nitrate stay the same. That way the plant gets everything it needs for strong fruit, cell stability and flavour, above all potassium and phosphorus. I keep the EC around 2.0, the pH stays at 5.5 to 6.0. For EC that’s around 2000 µS/cm and is needed to cover the higher nutrient demand of fruiting.
I regularly measure the EC and pH (ideally between 5.5 and 6.0) and let the nutrient solution aerate well, the air pump stays on. Only then do the roots stay healthy and the plant can take up the nutrients fully. Above all, calm is important now: even water, even values, no big jumps. The ripening phase ends with the harvest, after 3 to 6 weeks depending on variety.
A pepper is ripe when it has its full colour and feels firm. That’s when it tastes best. You can eat green peppers too, they’re simply not ripe yet and less sweet. Depending on variety, ripening takes a few weeks after flowering. Cut the fruits off with a sharp knife, then no shoot tears off.
6Late phase
one to two weeks before harvest · keep values steady
In the late phase, about one to two weeks before harvest, I concentrate on letting the peppers ripen for flavour and removing possible salt residues from the system. Many gardeners lower the EC sharply for this or stop feeding altogether. Many call this “flushing”. This phase is optional, and there’s no evidence that flushing improves pepper flavour. A sudden drop in values, on the other hand, stresses the plant.
That’s why I keep the EC steady around 2.0 until harvest and keep feeding normally. Against salt residues it helps that I top up with ready-mixed nutrient solution and change it completely if the EC rises for no reason. Still important: the plant keeps needing fresh water with a suitable pH (between 5.5 and 6.0), good oxygen supply via the air pump and stable temperatures. That way the fruits ripen evenly, without stress, and keep their full flavour until harvest.


168 pages, simply explained for beginners and with videos on the topics (in German). Exactly how I grow myself: from sowing to harvest.
More about the book ›Important tips for growing peppers
Nutrients
Mixing nutrient
Pump timing
Dark germinator, not a light germinator
To be able to feed cleanly at all, you need starting water with a low EC. 200 to 400 µS/cm is ideal. To achieve that, I mix my tap water with rainwater or RO water. But here too: pure rainwater or pure RO water isn’t recommended, because it’s too soft and contains no mineral buffer. That can lead to pH swings that stress the plant additionally. Only the mix brings stability: it lowers the EC without losing the natural balance.
Only when you have your starting water under control can you adjust your nutrient solution exactly, to suit the growth phase of your plants. Everything starts with the right water.
Your water: the most important step before feeding
Measure your tap water without nutrient before mixing. The EC shows how much lime and salts are already in it. If your water already has a high EC, there’s less room for nutrient, and the plant can show deficiency despite a full solution.
| Your water | EC without nutrient | What you do |
|---|---|---|
| soft | below 0.3 | feed normally, measure the pH more often at first |
| medium | 0.3 to 0.5 | use a little less calcium nitrate |
| hard | above 0.5 | mix half and half with rain or RO water |
If you mix hard tap water half and half with rain or RO water, you roughly halve the hardness. I don’t use pure rain or RO water alone, it barely buffers and the pH swings more. More on my page about the EC value and the pH value.
Related:How hard is your water? Look it up by postcode (Germany)›
* Affiliate-Link: Bei einem Kauf erhalte ich eine Provision, dein Preis bleibt gleich. Preis inkl. MwSt., zzgl. Versand, Stand 8.11.2026. Bilder: Amazon Creators API

* Affiliate-Link: Bei einem Kauf erhalte ich eine Provision, dein Preis bleibt gleich. Preis inkl. MwSt., zzgl. Versand, Stand 8.11.2026. Bilder: Amazon Creators API
Light and location
Outdoors peppers need full sun. I saw for myself how much that matters: one year my pepper tower stood in full sun and grew 2.50 metres tall. The year after, the tomatoes stood in front of it, the peppers were in the shade until 1 pm and stayed much smaller. So place big plants so they don’t take the sun from others.
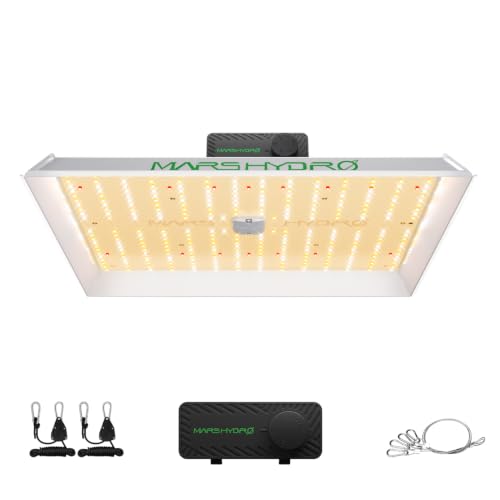
Indoors you need a lamp. Peppers want much more light than lettuce, about 350 to 500 PPFD. I tested it: 35 peppers stood under a stronger lamp, 35 under a weaker one, with the same distance and the same timer. Under the stronger one they got bigger. So a good lamp pays off. If it’s weaker, leave it on longer, but never more than 16 hours.
* Affiliate-Link: Bei einem Kauf erhalte ich eine Provision, dein Preis bleibt gleich. Preis inkl. MwSt., zzgl. Versand, Stand 8.11.2026. Bilder: Amazon Creators API
Also good for indoors: SANlight FLEX II lamp set* and the grow box complete set* at Grow-Shop24.
Related:How much light your plants need›Recommended products for peppers from my shop
 Buy the HydroFlex Tower complete set for peppers and vegetables without soilHarvest all year, independent of the weather.Buy in the shop ›
 Seedling station for 35 plants with net pots for hydroponicsSo your plants get off to a proper start.Buy in the shop ›
 Seedling box with lid and foam cubes for starting peppersSo your plants get off to a proper start.Buy in the shop ›
 Foam mat for 100 seedsSuitable for all types of seed.Buy in the shop ›
Recommended products for peppers from Grow-Shop24.de
* Advertising link: I earn a commission if you buy, your price stays the same.
 Bluelab OnePen pH and EC meter for hydroponic nutrient solution*Ideal for beginners and pros.Available at Grow-Shop24.de* ›
 Bluelab Guardian monitor for pH, EC and temperature around the clock*Round-the-clock measuring.Available at Grow-Shop24.de* ›
 Grow box complete set with LED grow light for peppers indoors*Growing all year, independent of the weather.Available at Grow-Shop24.de* ›
 SANlight FLEX II LED grow light for seedlings and vegetables*Seedling lamp and year-round growingAvailable at Grow-Shop24.de* ›
Recommended products for peppers from Amazon
* Advertising link: I earn a commission if you buy, your price stays the same.
 Complete hydroponic nutrient for leaves, flowers and roots*For leaves, flowers and strong roots.Available at Amazon.de* ›
 pH and EC permanent monitor with app for the hydro tower*Round-the-clock measuring with app.Available at Amazon.de* ›
 LED grow light for peppers and vegetables indoors*Strong lighting for vegetables.Available at Amazon.de* ›
 Reverse osmosis system for hard tap water in hydroponics*Suitable for water that’s too hard.Available at Amazon.de* ›
* Affiliate links: I earn a commission if you buy, your price stays the same.
Common problems & solutions
Peppers in hydroponics

* Affiliate-Link: Bei einem Kauf erhalte ich eine Provision, dein Preis bleibt gleich. Preis inkl. MwSt., zzgl. Versand, Stand 8.11.2026. Bilder: Amazon Creators API

* Affiliate-Link: Bei einem Kauf erhalte ich eine Provision, dein Preis bleibt gleich. Preis inkl. MwSt., zzgl. Versand, Stand 8.11.2026. Bilder: Amazon Creators API
Related:Recognising and treating pests and diseases›📖I cover spider mites, thrips, blossom end rot and root rot in detail in my book (in German) in the chapter “Probleme lösen”. Just check the table of contents.›Conclusion
Peppers are among the most popular and productive plants in the hydro tower. With the right feeding schedule, ideal EC and pH values and plenty of light you’ll get strong plants and a rich harvest. I’m happy to help you personally with any questions about growing peppers in the hydro tower!
Continue with your own growing
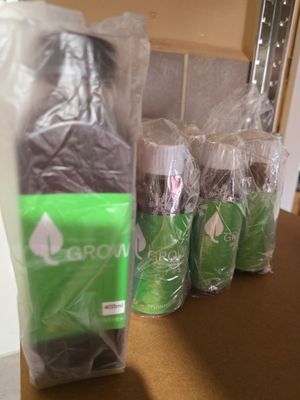
Seedling and leaf nutrient from one bottle, with calcium and magnesium, made for soft water. For all plants from sowing to the growth phase, leafy plants until harvest.
View in the shop ›A few questions about space, location and what you want to harvest, and you get a recommendation.
To the tower advisor ›Questions about your setup? Message me on WhatsApp.
Tapping opens WhatsApp (provider: WhatsApp Ireland Ltd.). More in the privacy policy.
FAQ about peppers in hydroponics
When do I sow peppers for the hydro tower?
Do peppers need light or darkness to germinate?
Which pepper varieties are particularly suitable for the hydro tower?
Is there a difference in caring for sweet and hot peppers in the hydro tower?
Which pH value is ideal for peppers?
What EC value do peppers need?
Which nutrient do I use for peppers?
Which hydroponic systems are particularly suitable for peppers?
Can peppers grow in the vertical tower?
How much space does a pepper plant need in the hydro tower?
What role does oxygen supply to the roots play?
How long should the pump run for peppers?
Which location is best for the hydro tower?
How much light do peppers need indoors?
How can I use the hydro tower in winter?
Can I bring peppers indoors in autumn?
How do I know whether my peppers are getting too little or too much water/nutrients?
How often and how much should I change the nutrient solution?
How can I encourage growth and fruiting?
Do I have to pollinate peppers?
Which typical diseases and pests occur?
What to do about flower drop or poor fruit set?
What helps against blossom end rot in peppers?
How do I deal with over- or underfeeding?
How do I prevent root rot or algae?
How do I recognise the best time to harvest?
How can I keep using the plants after harvest?
How high are the running costs?
How much yield can I expect compared to growing in soil?
You’ll find more vegetables without soil under vegetable growing in the hydro tower.